Like last time, today we’ll be covering a topic that will be useful to Pi users in general, not just those who’ve built arcade cabinets: how to use a rotary encoder to control your Pi’s system volume.
The problem
Though I’m quite satisfied with the speakers I got, they don’t have their own volume knob, so if I want to change the volume I need to do it in software. Somewhere in the EmulationStation menu system, perhaps three levels deep, there’s a way to launch a utility that lets you set the system volume. That’s not good enough.
The emulators themselves keep their own volume setting. The ones that support libretro will allow me to set a universal key binding for controlling volume, but (a) that requires me to learn and remember an obscure button combo, and (b) not all of RetroPie’s emulators support libretro, and the ones that don’t each have a different hotkey for setting volume. Not good enough.
Instead I resolved to solve this with my own hardware. Surprisingly, we’re off the beaten path here — though I’m certainly not the first person to need this, my searching didn’t turn up a canonical “how to put a volume knob on your Pi” guide.
The hardware

The volume knob has been around forever. For instance, if you’re old enough to want to build an arcade cabinet, you probably remember your grandparents’ TV and how it didn’t have a remote, which meant you had to twist a knob on the set itself to control the volume. Simpler times.
Knobs are less ubiquitous in this age because of the whole analog‐to‐digital shift, and because knobs don’t really work well on remotes. But knobs are great for physical interfaces! People understand them. They allow for fast, precise adjustments. They don’t take up much space.
But because we need a knob that speaks digitally, we’ll be using a rotary encoder.
Rotary encoders, as the name implies, turn rotation into information, but in a far different way from your ordinary analog knob. The feeling of turning the knob on a rotary encoder makes clear that this is a digital operation: there are a certain number of increments on the knob (called steps or pulses), and if you turn it slowly you can feel each one “click” by.
There’s one more crucial difference. Consider your grandparents’ TV again: if you keep turning the volume knob clockwise, it’ll stop turning when it reaches its maximum volume. And the position of that knob acts as the single source of truth. There’s no way to change the volume other than turning that knob. When TVs started including remote controls, suddenly volume needed to be changed from two different places. Hence the volume knob and its absolute scale got replaced with the relative scale of “volume up” and “volume down” buttons.
That’s why the rotary encoder suits us so well: it can be turned in either direction as much as you like. All it knows how to do is report clockwise pulses and counterclockwise pulses. On a 24‐step knob, if you turn it clockwise ¼ of the way around, it’ll report “six pulses to the right.” So the encoder won’t get confused if the volume gets changed by another means without its involvement. It just says “louder” or “softer.” If we’re already at maximum volume and it wants us to go louder, we can just ignore it.
Wiring it up
I picked this one up from Adafruit, but any will do. This one also lets you push the knob in and treats it like a button press, so I’ll use that control to toggle “mute” on and off.
That means there are five terminals to hook up: three for the knob part (A, B, and ground), and two for the button part (common and ground). So we need at least four GPIO pins: three ordinary digital pins and one ground pin. (You can either split one ground pin and run it to both ground terminals or, if you’re lazy like me, just use two different ground terminals to save yourself the wire splicing.)
Here’s how I hooked them up. (Again, use pinout.xyz to match up these numbers with pin locations on the Pi.)
| Description | BCM # | Board # |
|---|---|---|
| knob pin A | GPIO 26 | 37 |
| knob pin B | GPIO 19 | 35 |
| knob ground | ground pin below GPIO 26 | 39 |
| button common | GPIO 13 | 33 |
| button ground | ground pin opposite GPIO 13 | 34 |
As always, you can use different pins. Pick whichever ones suit your needs. Just note what gets put where so that you can refer to them by number in the code.
Writing a volume daemon
At this point, if you’ve got the knob attached, all that will happen is that it will send signals to the Pi in the form of GPIO pins pulled high or low. But “general‐purpose input/output” means that these pins have no meaning of their own. Just as we did last time with the power button, we’ll have to monitor those pins and convert their signals into intent.
The approach will be the same as last time: write a Python script that listens for signals and turns them into commands, then make that script into a daemon that runs on every boot. The execution will be a bit more complicated because we’ve got several different pins that need monitoring and a more complex state to manage.
First let’s look at the script. It’s far too long to consider line‐by‐line the way we did last time, but I’ll try to hit the bullet points farther below.
#!/usr/bin/env python3
"""
The daemon responsible for changing the volume in response to a turn or press
of the volume knob.

The volume knob is a rotary encoder. It turns infinitely in either direction.
Turning it to the right will increase the volume; turning it to the left will
decrease the volume. The knob can also be pressed like a button in order to
turn muting on or off.

The knob uses two GPIO pins and we need some extra logic to decode it. The
button we can just treat like an ordinary button. Rather than poll
constantly, we use threads and interrupts to listen on all three pins in one
script.
"""

import os
import signal
import subprocess
import sys
import threading

from RPi import GPIO
from queue import Queue

DEBUG = os.environ.get('DEBUG') == '1'

# SETTINGS
# ========

# The two pins that the encoder uses (BCM numbering).
GPIO_A = 19
GPIO_B = 26

# The pin that the knob's button is hooked up to. If you have no button, set
# this to None.
GPIO_BUTTON = 13

# The minimum and maximum volumes, as percentages.
#
# The default max is less than 100 to prevent distortion. The default min is
# greater than zero because if your system is like mine, sound gets
# completely inaudible _long_ before 0%. If you've got a hardware amp or
# serious speakers or something, your results will vary.
VOLUME_MIN = 60
VOLUME_MAX = 96

# The amount you want one click of the knob to increase or decrease the
# volume. I don't think that non-integer values work here, but you're welcome
# to try.
VOLUME_INCREMENT = 1

# (END SETTINGS)
#


class RotaryEncoder():
    """
    A class to decode mechanical rotary encoder pulses.

    Ported to RPi.GPIO from the pigpio sample here:
    http://abyz.co.uk/rpi/pigpio/examples.html
    """

    def __init__(self, gpio_a, gpio_b, callback=None, gpio_button=None,
                 button_callback=None):
        self.last_gpio = None
        self.gpio_a = gpio_a
        self.gpio_b = gpio_b
        self.gpio_button = gpio_button

        self.callback = callback
        self.button_callback = button_callback

        self.lev_a = 0
        self.lev_b = 0

        GPIO.setmode(GPIO.BCM)
        GPIO.setup(self.gpio_a, GPIO.IN, pull_up_down=GPIO.PUD_UP)
        GPIO.setup(self.gpio_b, GPIO.IN, pull_up_down=GPIO.PUD_UP)

        GPIO.add_event_detect(self.gpio_a, GPIO.BOTH, self._callback)
        GPIO.add_event_detect(self.gpio_b, GPIO.BOTH, self._callback)

        if self.gpio_button:
            GPIO.setup(self.gpio_button, GPIO.IN, pull_up_down=GPIO.PUD_UP)
            GPIO.add_event_detect(self.gpio_button, GPIO.FALLING,
                                  self._button_callback, bouncetime=500)

    def destroy(self):
        GPIO.remove_event_detect(self.gpio_a)
        GPIO.remove_event_detect(self.gpio_b)
        GPIO.cleanup((self.gpio_a, self.gpio_b, self.gpio_button))

    def _button_callback(self, channel):
        self.button_callback(GPIO.input(channel))

    def _callback(self, channel):
        level = GPIO.input(channel)
        if (channel == self.gpio_a):
            self.lev_a = level
        else:
            self.lev_b = level

        if level != 1:
            return

        # When both inputs are at 1, we'll fire a callback. If A was the most
        # recent pin set high, it'll be forward, and if B was the most recent
        # pin set high, it'll be reverse.
        if (channel != self.last_gpio):  # (debounce)
            self.last_gpio = channel
            if channel == self.gpio_a and self.lev_b == 1:
                self.callback(1)
            elif channel == self.gpio_b and self.lev_a == 1:
                self.callback(-1)


class VolumeError(Exception):
    pass


class Volume:
    INCREMENT = VOLUME_INCREMENT
    MIN = VOLUME_MIN
    MAX = VOLUME_MAX

    def __init__(self):
        # Set an initial value for last volume in case we're muted when we
        # start.
        self.last_volume = self.MIN
        self._sync()

    def up(self):
        """Turn the volume up by one increment."""
        return self._change(self.INCREMENT)

    def down(self):
        """Turn the volume down by one increment."""
        return self._change(-self.INCREMENT)

    def _change(self, delta):
        v = self.volume + delta
        if v < self.MIN:
            v = self.MIN
        if v > self.MAX:
            v = self.MAX
        return self.set_volume(v)

    def set_volume(self, v):
        self.volume = v
        output = self._amixer("set 'PCM' unmute {}%".format(v))
        self._sync(output)
        debug("Volume: {}".format(self.status()))
        return self.volume

    def toggle(self):
        """
        Changes the volume to muted or unmuted (whichever is the
        opposite of its current state).
        """
        if self.is_muted:
            output = self._amixer("set 'PCM' unmute")
        else:
            # We're about to mute ourselves. We should remember the last volume
            # value we had so we can restore it later.
            self.last_volume = self.volume
            output = self._amixer("set 'PCM' mute")

        self._sync(output)

        if not self.is_muted:
            # We've just unmuted ourselves, so we should restore whatever
            # volume we had previously.
            self.set_volume(self.last_volume)

        debug("Volume: {}".format(self.status()))
        return self.is_muted

    def status(self):
        """Returns a description of the current volume level and mute state."""
        if self.is_muted:
            return "{}% (muted)".format(self.volume)
        return "{}%".format(self.volume)

    # Asks the system for its current volume in order to synchronize it with
    # this class's state.
    def _sync(self, output=None):
        # Any `amixer` command will return the same status output, so other
        # methods can optionally pass in the output from a call they made to
        # `amixer` in order to save us the trouble.
        if output is None:
            output = self._amixer("get 'PCM'")

        # Inspect the output with some simple string parsing. We forgo
        # regular expressions here because we'll be hitting this code path
        # quite a bit and we want it to be as fast as possible.
        lines = output.readlines()

        # We only care about the last line of output.
        last = lines[-1].decode('utf-8')

        # The volume and mute state are both in the last line, each one
        # surrounded by brackets. So we'll start from different ends of the
        # line to find them.
        i1 = last.rindex('[') + 1
        i2 = last.rindex(']')

        self.is_muted = last[i1:i2] == 'off'

        i1 = last.index('[') + 1
        i2 = last.index('%')

        # In between these two will be the percentage value.
        pct = last[i1:i2]
        self.volume = int(pct)

    # Shell out to `amixer` to set/get volume.
    def _amixer(self, cmd):
        p = subprocess.Popen("amixer {}".format(cmd), shell=True,
                             stdout=subprocess.PIPE)
        status = p.wait()
        if status != 0:
            raise VolumeError("Unknown error")
            sys.exit(0)

        return p.stdout


if __name__ == "__main__":

    queue = Queue()
    event = threading.Event()

    def debug(str):
        if not DEBUG:
            return
        print(str)

    # Runs in the main thread to handle the work assigned to us by the
    # callbacks.
    def consume_queue():
        # If we fall behind and have to process many queue entries at once,
        # we can catch up by only calling `amixer` once at the end.
        while not queue.empty():
            delta = queue.get()
            if delta == 0:
                v.toggle()
            elif delta == 1:
                v.up()
            elif delta == -1:
                v.down()

    # on_turn and on_press run in the background thread. We want them to do
    # as little work as possible, so all they do is enqueue the volume delta.
    def on_turn(delta):
        queue.put(delta)
        event.set()

    def on_press(value):
        # We'll use a value of 0 to signal that the main thread should toggle
        # its mute state.
        queue.put(0)
        event.set()

    def on_exit(a, b):
        print("Exiting...")
        encoder.destroy()
        sys.exit(0)

    debug("Knob using pins {} and {}".format(GPIO_A, GPIO_B))

    if (GPIO_BUTTON is not None):
        debug("Knob button using pin {}".format(GPIO_BUTTON))

    v = Volume()
    debug("Initial volume: {}".format(v.volume))

    encoder = RotaryEncoder(
        GPIO_A,
        GPIO_B,
        gpio_button=GPIO_BUTTON,
        callback=on_turn,
        button_callback=on_press
    )
    signal.signal(signal.SIGINT, on_exit)

    while True:
        # This is the best way I could come up with to ensure that this
        # script runs indefinitely without wasting CPU by polling. The main
        # thread will block quietly while waiting for the event to get
        # flagged. When the knob is turned we 're able to respond immediately,
        # but when it's not being turned we're not looping at all.
        #
        # The 1200-second (20 minute) timeout is a hack. For some reason, if
        # I don't specify a timeout, I'm unable to get the SIGINT handler
        # above to work properly. But if there is a timeout set, even if it's
        # a very long timeout, then Ctrl-C works as intended. No idea why.
        event.wait(1200)

        # If we're here because a callback told us to wake up, we should
        # consume whatever messages are in the queue. If we're here because
        # there were 20 minutes of inactivity, no problem; we'll just consume
        # an empty queue and go right back to sleep.
        consume_queue()
        event.clear()
Cripes! This is a lot of code. We’ll talk about what it’s doing in just a minute, but first let’s see if we can get it to work.
Once you’ve looked over the source code, put it on your Pi:
curl "https://andrewdupont.net/sample/monitor-volume.txt" > ~/bin/monitor-volume
chmod +x ~/bin/monitor-volume
(If you don’t have /home/pi/bin in your path, consult part five for instructions.)
Now edit the file with your favorite editor. The “Settings” section near the top of the script will let you define which GPIO pins you’re using and how you want the volume control to behave.
The tool we’ll be using to control system volume is called amixer. It quantifies system volume as a percentage. For my cabinet, I decided that one click of the knob should change the volume by one percentage point, and that it should top out at 96% (as a precaution against audio distortion) and bottom out at 60% (at which point I couldn’t hear a damn thing through my speakers). Your results may vary.
Also consider the INCREMENT constant; if you find that you’d like the volume to change more rapidly when you turn the knob, you can change this number to 2 or more.
Let’s run this script in the foreground just to test it out. Run this script with verbose output:
DEBUG=1 monitor-volumeWhen you turn or press the knob, the script should report what it’s doing.
The first thing to check is that the volume increases rather than decreases when you turn it to the right. If it behaves the opposite way, either swap the A and B pins on your Pi, or just swap the two numbers in the script. (I’ve never bothered to figure out which pin maps to clockwise and which pin maps to counter‐clockwise because it’s easier to just guess and see if you got it right.)
How does this work?
If everything is working, we can daemonize this script and declare victory. But first I want to explain what the script is doing. If you don’t give a damn, skip this very long section and I’ll see you near the end of this post.
We can divide this script up into three parts:
- A
RotaryEncoderclass whose job is to listen on the rotary encoder’s pins and turn the signal into the information we care about. When we instantiate it we’ll give it two functions. One of them gets called when the knob turns in either direction. The other gets called when the button is pressed. - A
Volumeclass whose job is to know what the current volume is and how to tellamixerto change or it. - A section near the bottom where we create one instance of each of these classes and write some glue code to make them work together.
Let’s see if we can get an understanding of what’s going on here without becoming GPIO experts.
Handling the pins
Last time we talked about two different ways to interact with GPIO pins. You can read their state whenever you like…
value = GPIO.input(some_pin)…which has its uses but isn’t ideal for detecting changes. (What if a pin flips from low to high, then back to low again, in between checks? We’d miss it entirely.)
You can pause execution until a given pin changes its state…
GPIO.wait_for_edge(some_pin, GPIO.RISING)…which is just what we needed in the power button script from last time. But it won’t work here — we need to listen for three different pins changing.
That’s why we’re using a different approach:
GPIO.add_event_detect(some_pin, GPIO.RISING, on_pin_change)

def on_pin_change(channel):
  print "Pin changed: {}".format(channel)
Awesome! Event‐driven programming! I can say “run this function when this other thing happens!” I’ve written JavaScript for years! I understand this! But wait: it’s not quite the same. The callback function will run, but it will run on a different thread. This isn’t a scary thing for a script as simple as ours, but it’s not something we can ignore either. We’ll discuss our concurrency strategy in just a moment.
The RotaryEncoder class
Our goal with this class is to encapsulate all the logic needed to turn rising and falling signals into the atoms we want: volume up, volume down, or toggle mute.
The button
The button’s pin gets configured as an input pin and pulled up:
GPIO.setup(self.gpio_button, GPIO.IN, pull_up_down=GPIO.PUD_UP)That’s its default state. When the button is pressed, the script will notice because it will get pulled to low voltage:
GPIO.add_event_detect(self.gpio_button, GPIO.FALLING, self._button_callback, bouncetime=500)The GPIO library lets us treat this “falling” voltage as an event that we can attach a function to. And because the physical world isn’t always elegant, we debounce for 500 milliseconds — i.e., after the first fire, we ignore any subsequent fires for the next 500ms because we assume they’re just a flickering signal rather than additional button presses.
The knob
The knob itself is a bit trickier. The button only has to distinguish between pressed and not‐pressed, but the knob has to distinguish between three states: idle, one pulse clockwise, and one pulse counter‐clockwise. That’s why it needs two pins (A and B) to report its state.
Pins A and B are ordinary digital pins. They can be high or low. On my knob, they’re both high in an idle state. One pulse to the left or to the right will flip them both low, then back high. The way you tell the direction of the turn is by observing the order in which they flip. For a clockwise pulse, A will do this low/high flip before B. For a counter‐clockwise pulse, B will flip before A. (Or vice‐versa. Again, I can never remember.)
We listen for changes in both pins, but we only act when both pins are once again high. If they aren’t, we exit the callback early. This means that when they are both high, we’ll be inside the callback that was triggered by the second pin’s change. Since we know which pin triggered a given callback, that’s how we can figure out which direction we were turned. We invoke the callback with either -1 or 1.
The Volume class
The way to change the Pi’s system volume is to use the amixer utility. Running amixer get 'PCM', for example, will return a few lines of output that show the state of that audio device. Running amixer set 'PCM' 90% will set the system volume to 90% and will return those same few lines of output.
So that’s what our Volume class is doing. It exposes methods for incrementing and decrementing the volume and for toggling muting. On initialization we get the current volume state, and after every change we make to the volume, we parse the output of amixer to make sure we’re staying in sync with what the Pi is reporting.
There are also a few weird states we can get ourselves into. What should happen if someone turns the knob when the volume is muted? Should it implicitly unmute? What if the volume was muted when the script started — how do we know what volume to restore when we unmute? The class has answers for these questions and others.
Dealing with concurrency
Here’s what I know about threads: don’t use them. That’s the advice that I’ve heard over and over again. They’ve fallen out of fashion compared with other concurrency strategies that offer more safety through tighter constraints. But, hey, that’s the hand we’ve been dealt here. We’re using a library that handles certain tasks in a background thread for a legitimate reason.
So I need a multi‐threading strategy. My strategy will be to minimize the amount of concurrency happening for my own sanity.
- The main thread instantiates everything and sets up the GPIO events, then goes to sleep.
- When the knob turns, the callback we attached runs in its own thread. It figures out which direction we were turned, but rather than do anything about it, it just pushes
1(clockwise) or-1(counter‐clockwise) into a thread‐safe, first‐in‐first‐out queue. (Presses of the knob push a0into the queue.) - As its last official act, it signals to the main thread that there’s work to be done. It does this via
threading.Event, which is a simple way for one thread to go to sleep until another thread gives it a signal. - When the main thread wakes up, it consumes the queue in order. It interprets every item in the queue as either a volume increment, a volume decrement, or a mute toggle, and then calls the appropriate methods synchronously. It then goes back to sleep until another callback wakes it up.
By making the main thread do all the work, we’re re‐imposing a sane programming model that we can easily reason about. We’re guaranteed not to miss any change events, and we’re guaranteed to act on every single one of those events even if the main thread is being called less often than we’d like.
Could we do more work in the callback threads? Probably. I think the Volume class is thread‐safe. But why bother? We don’t need it for performance, so it’d only be widening the range of things that could go wrong. When we minimize the amount of work done in background threads, we can be more confident that our code is actually doing what we assume.
Running as a service
The .service file we need to make looks quite similar to the one for our power button. Create it at /home/pi/monitor-volume.service:
[Unit]
Description=Volume monitor

[Service]
User=pi
Group=pi
ExecStart=/home/pi/bin/monitor-volume

[Install]
WantedBy=multi-user.target
To enable it:
chmod +x ~/monitor-volume.service
sudo mv ~/monitor-volume.service /etc/systemd/system
sudo systemctl enable monitor-volume
sudo systemctl start monitor-volume
That should do it. Your volume knob should now be working. It should still be working after a reboot. Test it out using whatever method makes sense for your Pi; since mine is an arcade machine, I can easily test it by launching a game and letting it go into attract mode.
Installing the knob
Early on in my arcade project, my plan was to place a rocker switch just below the monitor and use it to toggle my ServoStiks between 4‐way mode and 8‐way mode. That switch got installed, but after only a bit of test‐driving, I discovered that I was quite bad at remembering to switch into 4‐way mode for games that needed it. So I decided to hook up the ServoStiks to GPIO and switch the mode automatically based on the game being launched. (We’ll cover this soon, though at this rate it’ll probably be part fourteen of this never‐ending series. Sorry.)
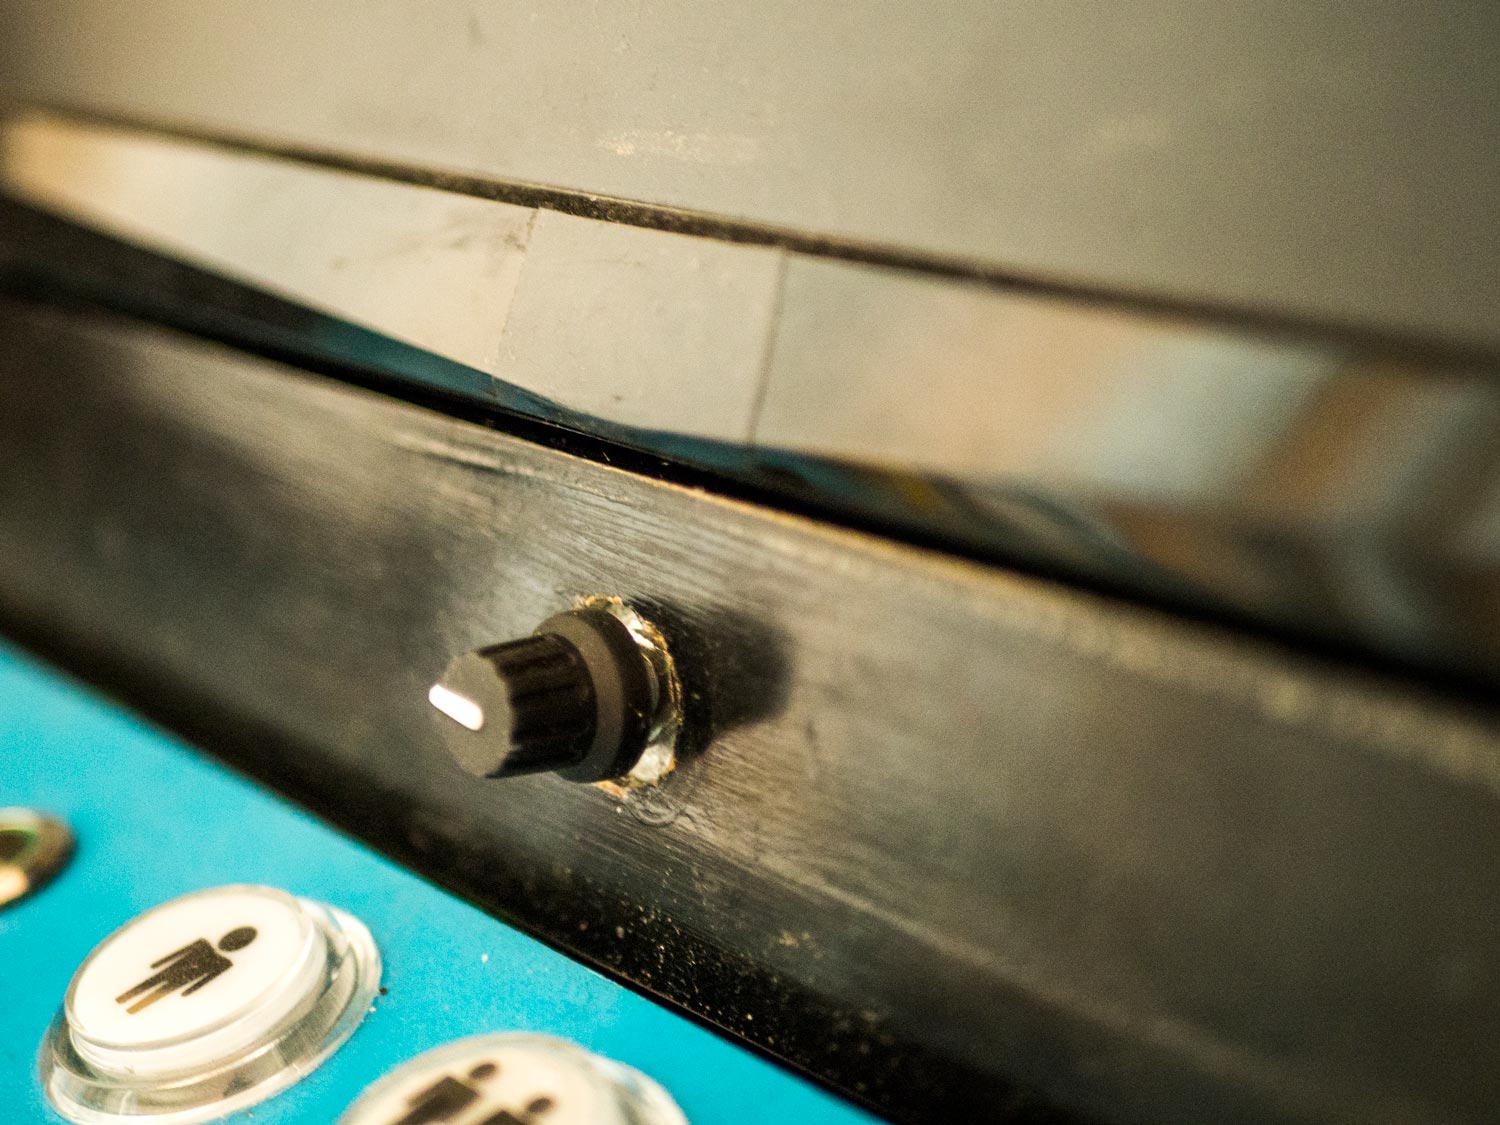
After the rocker switch’s removal, the volume knob was the obvious candidate to take its place. The existing hole was too wide, so I ended up widening the hole further and super‐gluing a washer in place. You can see how sloppy this is in the photo, but eventually I’ll get a slightly larger knob to hide this shame.
Installation is straightforward. Much like the buttons we installed, the encoder does a nut/bolt thing to hold it in place. The knob goes over the top of the shaft. You can probably find a fancy knob that will suit your needs — just make sure you have the space for it and that it’s the right size and shape. There are lots of knobs out there and it’s trickier than you think to find one that will fit your specific encoder.
Next time
In part five I left you with a cliffhanger: we’d managed to turn the Pi on and off with the press of a single button, but not the monitor or marquee light. Next time I’ll show you how I used an Arduino to keep all three in sync.
Comments
Hi Andrew:
I managed to setup your script and if I run the monitor-volume in Debug from the command line it works but when I run it as a service although he service installs fine and starts fine, he volume doesn’t change or mute… any ideas?
Hmm. Maybe change the user it runs as to
rootjust for diagnosis? If it runs OK asroot, then it’s some sort of permissions issue. This sort of thing is what scares me out of Raspbian upgrades. :)Hi,
I was really excited to get this going as a REAL volume control for my cabinet. I have tried a few retropie builds including the latest from retropie site and when I run ‘DEBUG=1 monitor-volume’ I get:
File “/home/pi/bin/monitor-volume”, line 23, in
from RPi import GPIO
ImportError: No module named ‘RPi’
Any ideas on the best way to proceed?
I don’t know if you ever got this one sorted, but when I ran
sudo service monitor-volume statusI got some errors about the debugging environment variable; I changed the line in the script that readsDEBUG = os.environ.get('DEBUG') == '1'to the following:I’m not a Python coder but that did the trick – now the code runs at boot (thank God Python logic works the way you’d just expect, y’know, logic to work).
Except without the mystery
%%%NO-NEWLINE%%%line. That was the comment field, not me!That’s an artifact of some (apparently buggy) text processing code I’d written! Cleaned it up for you.
Hi Andrew – been looking for something like this for my arcadebuild. I do run into some problems. I cant get past 96% volume.
This is the output i get when I run DEBUG=1 monitor-volume:
Knob using pins 19 and 26
Knob button using pin 13
Initial volume: 96
Volume: 96%
Volume: 96%
Volume: 96%
Volume: 96%
Sometimes it jumps to 95, 94 or 93 % but always goes back tp 96 next turn on the know.
Any ideas?
Hi Andrew,
thank you for this awesome guide!
I’m new to all this. Can you please tell me how to hook this encoder correctly to work with your script?
I got this one from Keyes:
The pins on this encoder got different names..
https://www.modmypi.com/raspberry-pi/sensors-1061/rotary-encoders-1112/keyes-rotary-encoder-module
Manu thanks for your time!
Federico
I am having the same problem now. It was working fine before, but I had to reflash my sd card and now it’s doing this. Did you ever find a solution? Thanks
Hi Andrew,
I’m using an amplifier HAT on my rpi. Analog audio is disabled.
How do I go about changing the volume of Amixer Digital instead of PCM with your code? Is this even possible?
Would be great if I could use the code. Thanks in advance.
With the latest raspian upgrade, amixer wouldn’t work and I got this error:
To get around this, I had to add this to /boot/cmd.txt to revert to earlier behavior, then reboot the Pi:
The problem I have now is that a single rotation/click of the knob is resulting in 4 changes to the volume that seem to be all over the place and never settle.
e.g.
Run the following:
@frak, if that were happening to me, I’d do these things in this order:
To all future visitors to this page: My ability to answer questions decreases over time as RPi hardware and software move further away from what I was working with back in 2017. If you do run into a problem and then discover its solution, please follow the example of some of the earlier commenters and leave a comment explaining how you solved it.
I had the issue where I could run the manually and everything worked fine. As soon as I put it as a service it would not run at all. I would just get a message with ‘exit code’.
In my case the system saw different options for the mixer when it was running from service. I discovered this by executing ‘amixer scontrols’ from the terminal, then executing ‘sudo amixer scontrols’. With my default account the main simple control was listed as Master and there was one other one. When running as super user it would list out a lot more and Master was not one of the options. So I edited the script for all the places that listed ‘PCM’ I changed to Digital.