I’m Andrew! You might remember me from Part 3, in which I guided you up to the very moment that your firmware started running on your laundry spy — and then vanished without further explanation.
In this article — the finale to the series, I promise — you’ll actually install your laundry spy and calibrate it to your particular washer and dryer. Once you’ve got them working reliably, I’ll show you a few ESP8266 libraries that you can drop into this sketch (or others) if you crave more features.
Installing the spy
We haven’t actually installed the hardware near your washer and dryer yet because it’s not much fun to write code while sitting in your laundry room. It’s loud and stuffy and the ergonomics are all wrong. But now that we’ve demonstrated that the sketch is working well enough to measure vibration, it’s time to subject the spy to some real‐world data.
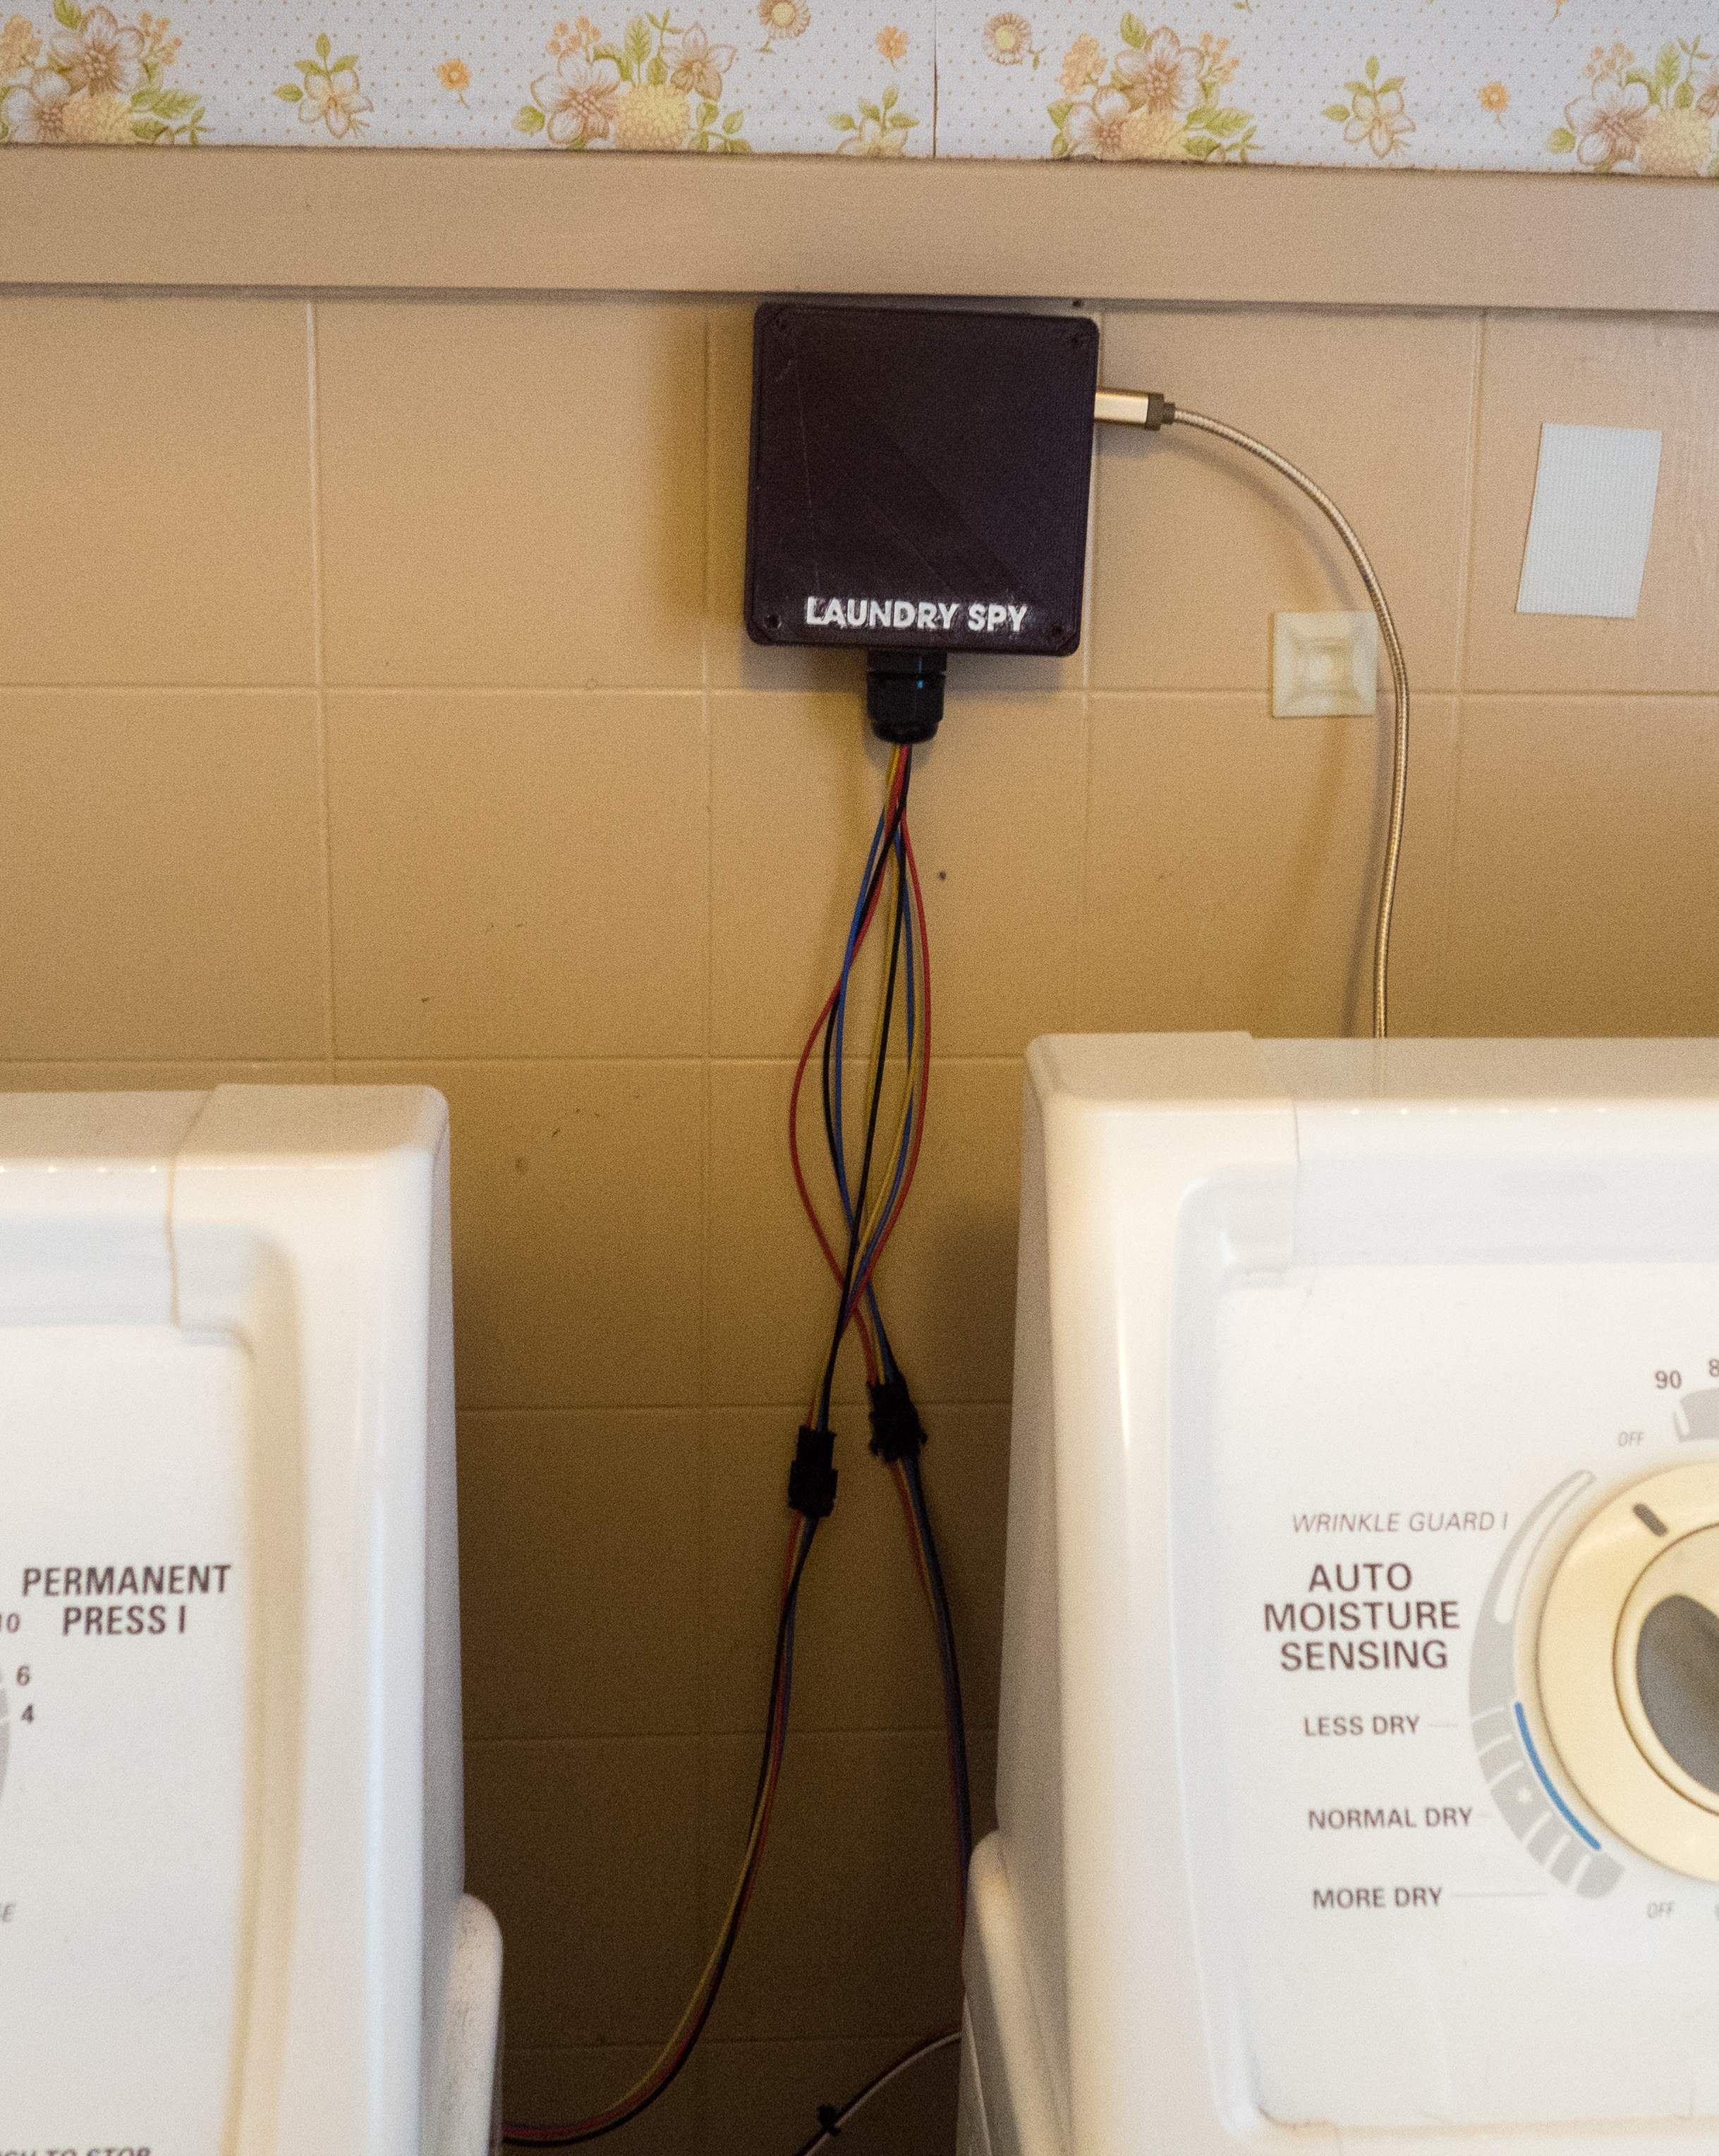
The ideal place to install your laundry spy is on the wall behind your washer and dryer at an equal distance from both. I tend to use velcro tape for applications like these where I might need to detach the thing later.
If you’d rather not attach anything to your walls — godspeed to the fellow renters out there trying to make their homes smarter in non‐destructive fashion — then you can mount the head unit on one of your actual machines.
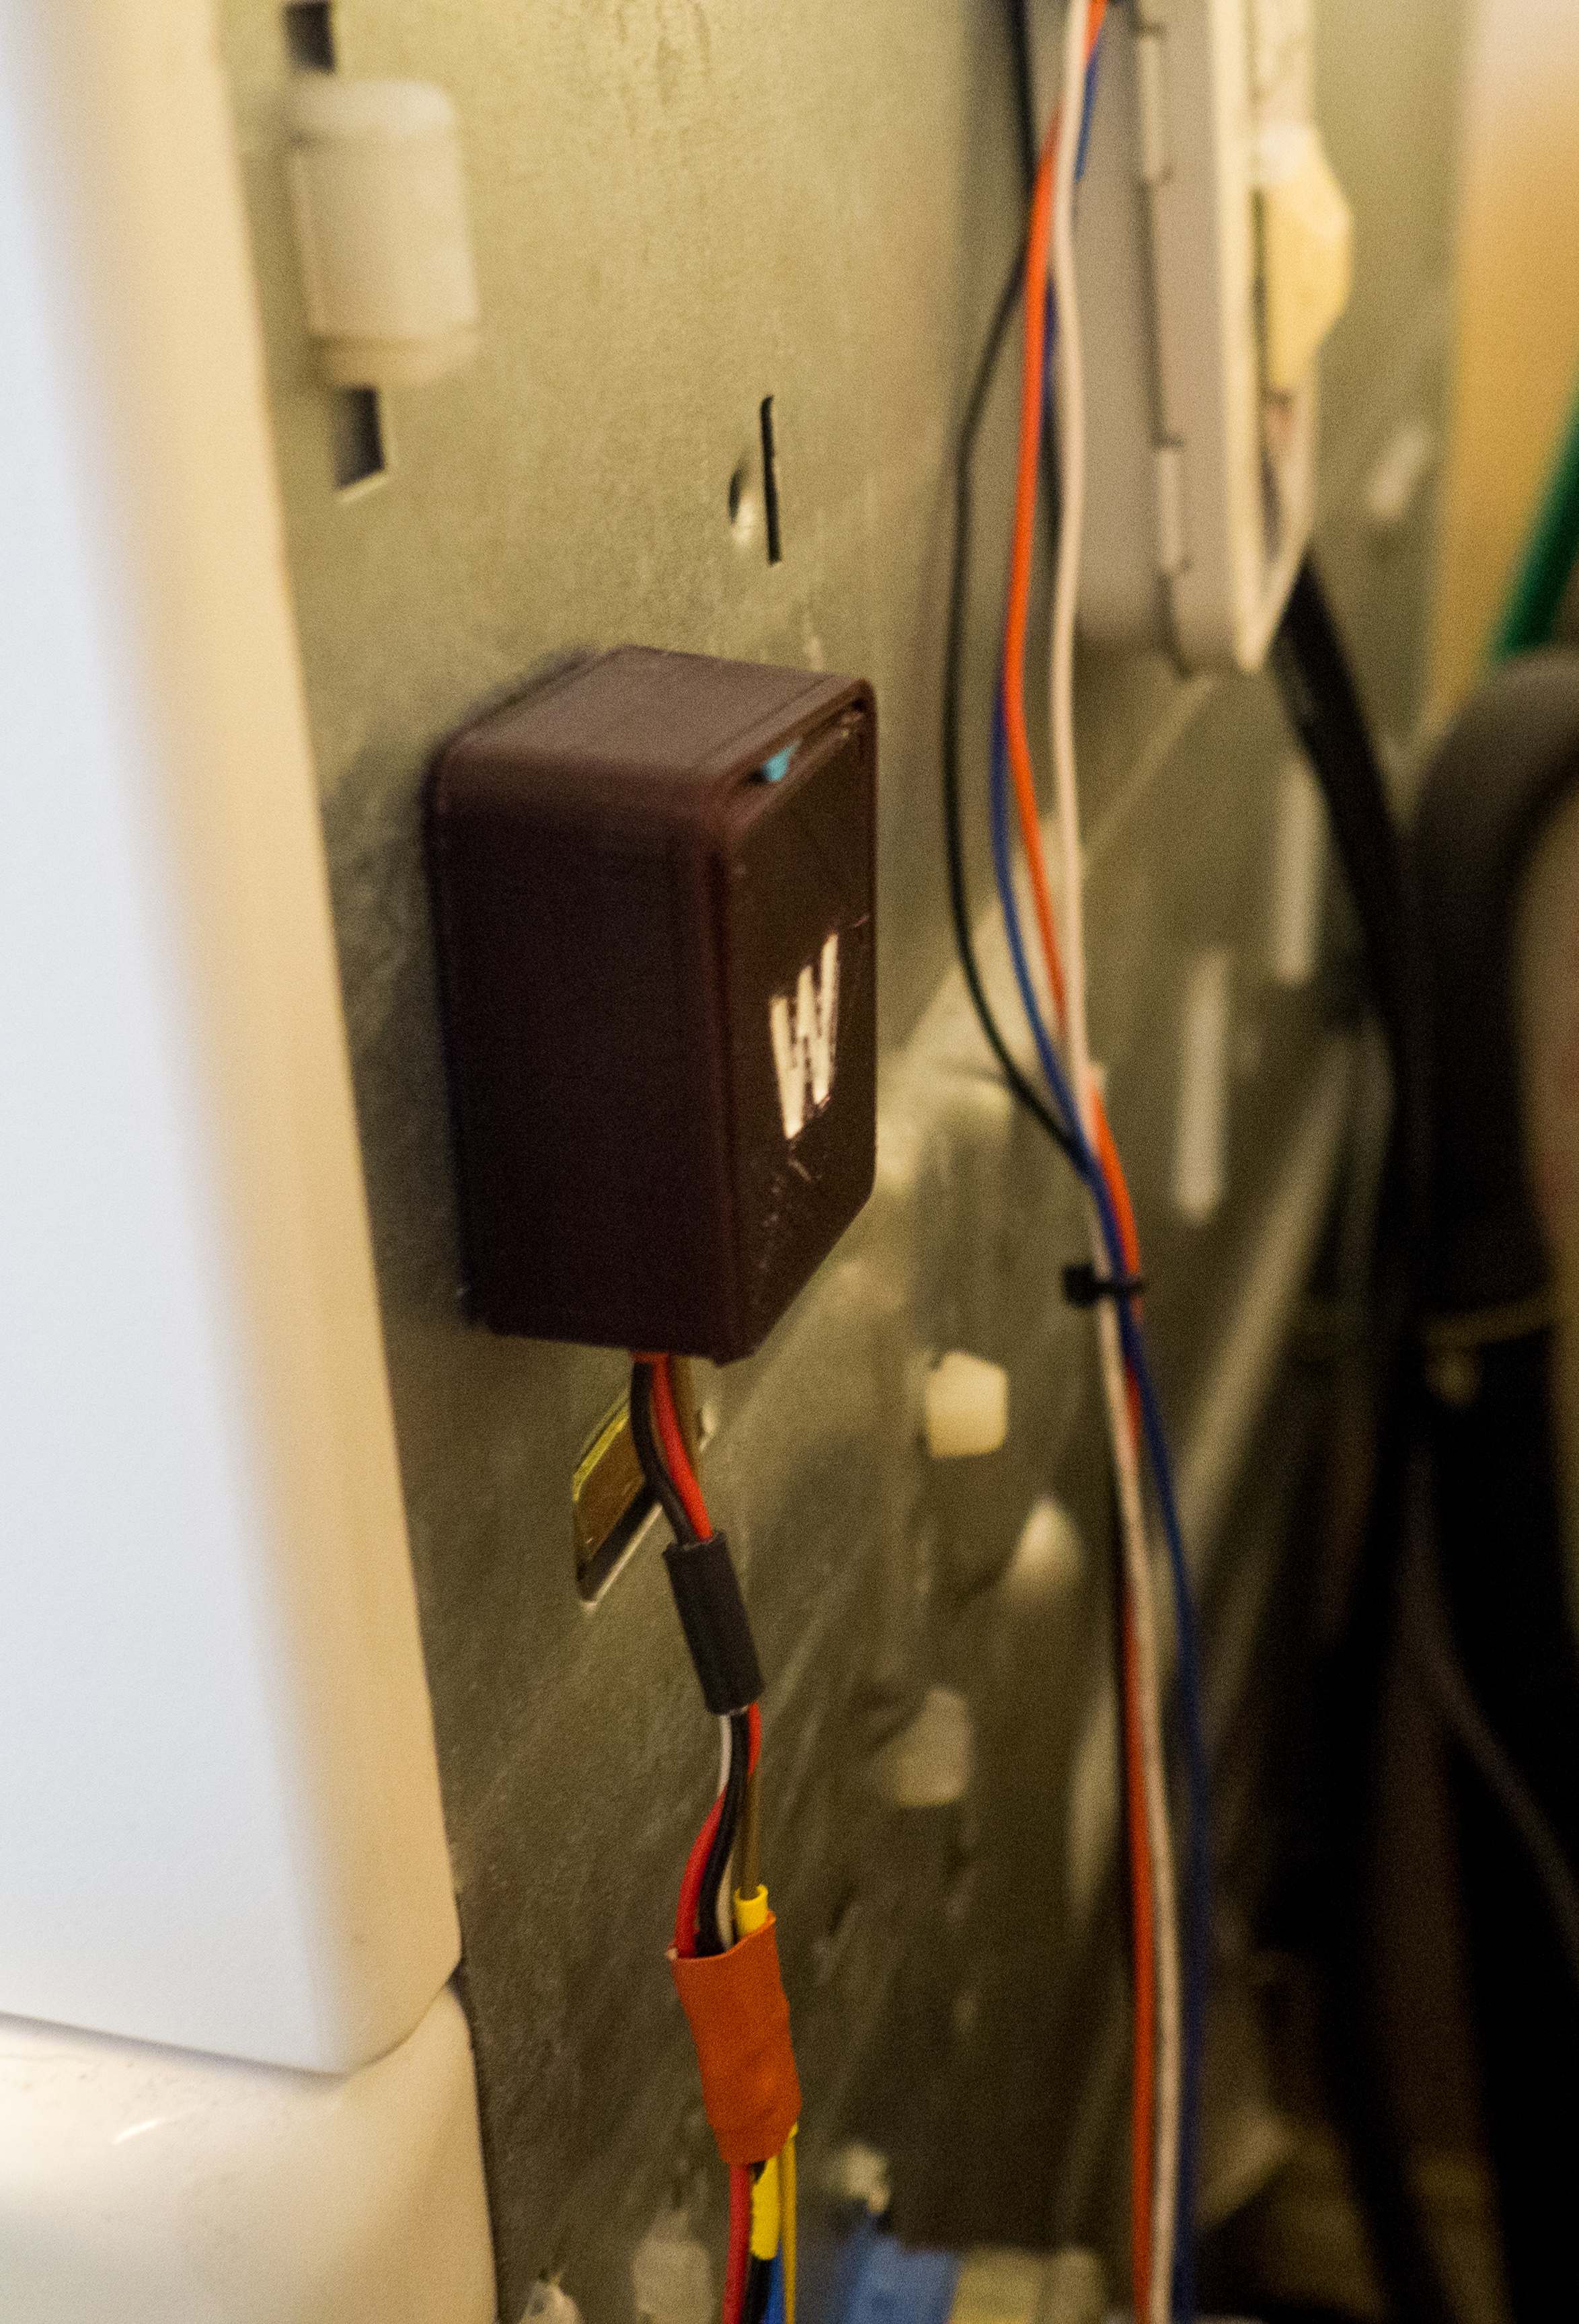
The two sensors themselves should be attached firmly to their machines, but it doesn’t really matter where. Put them wherever the tether will allow them to reach and where they won’t interfere with operation. I’ve got my sensors attached to the back corner of each machine nearest the spy itself.
I mounted mine with foam mounting tape, but VSB tape would work just as well. Hell, based on my quick research, you could even use a glued‐on magnet to keep the sensor case in place on the back of each machine.
The spy will get power from the USB micro port we incorporated into the design. You’ve probably got an extra wall wart charger sitting in a drawer somewhere, and if you don’t, cheap ones are available all over the place. The maximum power draw of an ESP8266 is under the 500mA you’d get from a powered USB port on your computer, and any AC-to-USB charger will provide at least that much current, so you don’t even have to be choosy. A spare Raspberry Pi power supply would also more than suffice.
As soon as it’s plugged in, the spy should run its firmware. Within a few seconds it’ll connect to WiFi and start broadcasting over MQTT.
Tuning the spy
The firmware publishes to four different MQTT topics — two each for the washer and dryer.
laundry-spy/washer/stateandlaundry-spy/dryer/statepublish the integer values of each of the five states:0for Idle,1for Maybe On,2for On,3for Maybe Off and4for Done. This happens as soon as the state changes.laundry-spy/washer/forceandlaundry-spy/dryer/forcepublish vibration scores. Not every vibration score; after all, we sample the score as often as 20 times each second. Instead, roughly every two seconds we’ll publish the most recent vibration score we got.
The purpose of publishing the force data directly is to help us get a sense of what vibration scores we can expect in various states. In this spirit, let’s listen in on the washing machine. Did you install mosquitto in Part 2? Run this from the command line:
mosquitto_sub -v \
  -h YOUR_MQTT_SERVER_IP -p YOUR_MQTT_SERVER_PORT \
  -t "laundry-spy/washer/force"
Do this when your washer is idle as a mere sanity check. You should get values very close to zero.
laundry-spy/washer/force 0.01
laundry-spy/washer/force 0.01
laundry-spy/washer/force 0.01
laundry-spy/washer/force 0.01
laundry-spy/washer/force 0.00
laundry-spy/washer/force 0.01
laundry-spy/washer/force 0.00
If you see an occasional spike, that’s fine. Our firmware should recognize those as false positives.
When you start a load of laundry, run that command again. Here’s what mine looks like when the washer is on:
laundry-spy/washer/force 0.03
laundry-spy/washer/force 0.07
laundry-spy/washer/force 0.06
laundry-spy/washer/force 0.03
laundry-spy/washer/force 0.14
laundry-spy/washer/force 0.02
laundry-spy/washer/force 0.10
laundry-spy/washer/force 0.10
laundry-spy/washer/force 0.08
laundry-spy/washer/force 0.10
laundry-spy/washer/force 0.19
laundry-spy/washer/force 0.03
laundry-spy/washer/force 0.08
laundry-spy/washer/force 0.15
laundry-spy/washer/force 0.08
laundry-spy/washer/force 0.05
# ...
The vibration scores you see when the machine is running should be, well, higher than the ones you got when it was idle. Sure, there are a couple of outliers in there; that 0.02 score is probably something we’d get once in a while when the machine is idle. But that’s why we wrote code that’s robust enough to consider scores over a longer window of time. A single high score won’t flip the machine into the On state, and a single low score won’t flip it back to Idle.
So you’ve got two kinds of scores: the sort you’ll get when your machine is idle, and the sort you’ll get when your machine is running. Use these to determine your threshold: pick a value that would routinely get exceeded when the machine is on, but not when it’s idle. In my case I picked 0.08.
You might need to come back to tune this value later. If you get through an entire cycle without the spy noticing and switching to the On state, your threshold is probably too high. If you get notifications telling you a cycle has finished, yet you have no memory of putting clothes in the washer or dryer, then your threshold is probably too low, or else you took Ambien and had a spate of household productivity right before you fell asleep.
Speaking of false positives… while the washer is running, let’s check on the vibration scores for the dryer.
mosquitto_sub -v \
  -h YOUR_MQTT_SERVER_IP -p YOUR_MQTT_SERVER_PORT \
  -t "laundry-spy/dryer/force"
laundry-spy/dryer/force 0.01
laundry-spy/dryer/force 0.03
laundry-spy/dryer/force 0.01
laundry-spy/dryer/force 0.00
laundry-spy/dryer/force 0.02
laundry-spy/dryer/force 0.04
laundry-spy/dryer/force 0.00These scores are low, but not as low as they’d be if the washer were idle. Some of the washer’s vibration is transferring to the dryer through the floor. (If your machines are sitting on a slab foundation, this probably won’t be a big factor, but our laundry room is in the back of a house built on a pier‐and‐beam foundation.) You want your threshold to be high enough that activity from the adjacent machine won’t generate a false positive.
My dryer’s threshold is 0.12 because it rumbles more violently than my washing machine — but I could probably move it up or down a bit without making a practical difference to its behavior. In fact, this version of the laundry spy has been running concurrently with the proof‐of‐concept version I made last year. Though the two machines vary in their accelerometer hardware and in the exact way they measure vibration changes, they behave almost identically, and notify me about finished laundry cycles at nearly the exact same time.
Setting the thresholds
Once you decide on good values for your washer threshold and dryer threshold, put them back into the sketch as the new values of WASHER_THRESHOLD and DRYER_THRESHOLD, then flash the new firmware onto the spy the way we did in Part 3.
The final exam
The next time you do laundry, you can take the laid‐back approach and simply wait to see if you get a notification from Pushover… or you can spy on the machine’s MQTT feeds before and during the beginning of the cycle to see if it’s switching states the way we expect.
Just before you start a cycle, subscribe to both the state and force topics for your machine by using the # wildcard:
mosquitto_sub -v \
  -h YOUR_MQTT_SERVER_IP -p YOUR_MQTT_SERVER_PORT \
  -t "laundry-spy/washer/#"
(This is why we’ve been using the -v switch this whole time; without “verbose” mode, you won’t see the name of the topic in the output.)
Since we set the “retain” flag when we publish a machine state, you should immediately get back a response:
laundry-spy/washer/state 0The 0 corresponds to an Idle state. So far, so good.
Go turn your washing machine on, but leave the mosquitto_sub command running.
By the time you get back to your computer, the state value should change to 1 (Maybe On), because it picked up on the vibrating machine almost instantly. (If this didn’t happen, look at the force readings being published and make sure they’re in the range that you expect. It’s possible that your threshold is way too high.)
After another 30 seconds, state should change to 2 (On). (If it goes back to 0 instead, that means at least three seconds elapsed without your threshold being exceeded. It’s possible that your threshold is slightly too high.)
If you get all the way to the On state, congratulations! Your spy will probably work just fine.
Monitoring it all the way to the Done state is possible, albeit a bit boring. Leave the command running in the background while you do other things. When you hear the cycle finish, verify that the state changed to 3 (Maybe Done). After about five minutes, it should change to 4 (Done) and then straight back to 0 (Idle).
(If the spy won’t progress to 3, or will get to 3 but never to 4, it means that your threshold is too low, and is being exceeded on a consistent basis even when your machine is idle.)
If all of this happens but you still don’t get a notification, then the problem is somewhere in your Node‐RED workflow, and you should test the Pushover integration by itself.
Oh, right, the Node‐RED workflow
I want to revisit that workflow just so we all understand what’s going on. This is what I had you import in Part 2. You can double‐click on each node if need be to make sure it’s doing exactly what I say it’s doing.

- This workflow will listen for messages published to
laundry-spy/washer/stateandlaundry-spy/dryer/state, just like we’ve been doing manually with Mosquitto. - All such messages will get sent to the “Done?” node, which will only allow those messages through if their payload is
4(our value for the Done state). - The function node will build a new message with
topicandpayloadvalues corresponding to the title and text of the Pushover notification we want to send. Then it’ll forward that message along to… - …the Pushover node, which turns it into a notification and sends it to the user who corresponds to the user key that you provided in the node’s configuration.

Easy, right?
Why did we do this?
If you wanted to build a laundry sensor with a minimal amount of effort, you’d probably be reading someone else’s tutorial right now.
On one hand, it sometimes bothers me that most Arduino‐esque tutorials I read — on Instructables and similar sites — are written in a rigid, recipe‐like fashion: do these exact things, then run this exact code. On the other hand, recipes do have their place — if you follow a recipe you’ll at least end up with edible food when you’re done.
My first version of the laundry spy didn’t need a local MQTT server — it published data to Adafruit IO, and then explicitly triggered a Zapier workflow via webhook when a cycle was done.
Ultimately, I decided to bring those functions in‐house when I began to do other IoT things. I wanted all my home automation logic in one place, and I didn’t want that place to be somewhere in the cloud when I could do it just as easily myself without a monthly fee.
Right now, the laundry spy is just one of about ten different devices in my house that communicate over MQTT. Node‐RED isn’t just my gateway to Pushover; it’s how I tell my backyard string lights to turn off at 10pm every night, and it’s how I tell my nightstand fan to turn off if it’s been on for at least three hours.
So this four‐part series wasn’t just about laundry. If you’ve read this far, you’re probably interested in doing other home automation–type things around the house, in which case the stuff we did in Part 2 isn’t overengineering; it’s just prudent foundational prep work.
Useful additions
At this point, you’ve got a pretty solid, straightforward firmware that does a small amount of things well, and which you can likely leave running indefinitely without any trouble. The WiFi library will automatically attempt to reconnect if your WiFi drops out, and losses of power are no big deal because the firmware will just start from scratch whenever it regains power.
When the spy has failed to notify me, it’s almost always been the fault of my IoT server, rather than the spy itself. In addition to Node‐RED, I’m running Homebridge (for HomeKit integration) and Redis (for various tasks that require persistence), and something I’m doing is causing either a hard freeze or a loss of network connectivity every couple weeks. So far I’ve been too lazy to hook up the headless machine to a display to diagnose it.
You might want to add some stuff to this sketch for your own convenience — in fact, the first two I’ll talk about are things that I left out of the sketch for simplicity’s sake.
ArduinoOTA
ESP8266s are starting to supplant Arduinos around my house even for tasks that don’t absolutely require internet connectivity, and it’s for one major reason: built‐in networking means firmware updates are easy. ArduinoOTA makes this possible: it’ll let you flash new firmware over the air instead of through a serial connection.
This is a godsend when you’ve got ten oddball devices doing things around your house and you’ve got to change something on each one. The caveat is that this process works only for sketches that are in correct working order; if your sketch is crashing, or otherwise not hitting its intended code path, you’ll have to tether to it the old‐fashioned way.
ArduinoOTA is built into the ESP8266/Arduino core, and its API is dead simple. Observe:
#include <ArduinoOTA.h>

void setup () {
  // other setup code, then...

  ArduinoOTA.setHostname(HOST);
  ArduinoOTA.onStart([]() {
    Serial.println("[OTA] Starting update...");
  });
  ArduinoOTA.onEnd([]() {
    Serial.println("[OTA] ...update finished.");
  });

  ArduinoOTA.onError([](ota_error_t error) {
    Serial.printf("OTA: Error[%u]: ", error);
    if      (error == OTA_AUTH_ERROR)    Serial.println("Auth Failed");
    else if (error == OTA_BEGIN_ERROR)   Serial.println("Begin Failed");
    else if (error == OTA_CONNECT_ERROR) Serial.println("Connect Failed");
    else if (error == OTA_RECEIVE_ERROR) Serial.println("Receive Failed");
    else if (error == OTA_END_ERROR)     Serial.println("End Failed");
  });

  ArduinoOTA.begin();
}

void loop () {
  // other loop code, then...
  ArduinoOTA.handle();
}
That’s it.
The Arduino IDE will list network update targets in the Tools → Port menu (under the “Network Ports” heading). And PlatformIO users can specify an update address in their platformio.ini file or via command‐line switch.
ArduinoOTA relies on mDNS, which Macs support natively, and which Linux machines support through Avahi (which is bundled by default in many distros, and usually installable via a package manager otherwise). Windows users can install Bonjour for Windows.
mDNSResolver
Oh, have I not talked about mDNS yet?
mDNS, otherwise known as Bonjour, is part of the glue that makes IoT easy. Instead of having to know each others’ IP addresses — and instead of making you implement your own home network DNS — it lets machines on the same network multicast the names they want to be called and advertise the services they provide. Computers also use mDNS to auto‐discover things like printers and scanners on your network.
Good news: the ESP8266/Arduino core comes with built‐in mDNS broadcast support. Our firmware declares a HOST constant (laundry-spy by default) and we advertise ourselves on our network by that name through a call to MDNS.begin(HOST).
Bad news: the built‐in support is limited to mDNS broadcast, not mDNS resolution. When configuring MQTT, we had to tell the laundry spy what our MQTT server’s IP address was, even though from my Mac I can refer to that same machine as home.local when using SSH.
Because hard‐coding IP addresses creates work for your future self, consider using the mDNSResolver library instead. It’s a focused library that can resolve mDNS‐style .local domains without any of the service discovery stuff you don’t need.
Here’s how I use it in my sketches:
#define MQTT_SERVER "home.local"

#include <WiFiUdp.h>
#include <mDNSResolver.h>

WiFiUDP udp;
mDNSResolver::Resolver mdnsResolver(udp);
char serverName[26];

void MQTT_resolve () {
  IPAddress ip;
  if ( ip.fromString(MQTT_SERVER) ) {
    // We were given an IP address.
    strcpy(serverName, MQTT_SERVER);
  } else {
    // We need to resolve this value via mDNS to get an IP.
    ip = mdnsResolver.search(MQTT_SERVER);
    if (ip == INADDR_NONE) {
      // We can’t resolve this address via mDNS. It might point to an
      // external server, so just copy it over to `serverName` and make it
      // someone else’s problem.
      Serial.print("Couldn't resolve mDNS server: ");
      Serial.println(MQTT_SERVER);
      strcpy(serverName, MQTT_SERVER);
    } else {
      // We have an IP address. PubSubClient expects it as a string, though.
      strcpy( serverName, ip.toString().c_str() );
    }
  }
}

void MQTT_connect() {
  Serial.print("Connecting to MQTT... ");

  // Have we resolved our server name yet?
  if (strlen(serverName) == 0) {
    MQTT_resolve();
    client.setServer(serverName, MQTT_SERVER_PORT);
  }

  // ...
}
When we first try to connect to the MQTT server, we’ll attempt to turn our configured MQTT_SERVER constant into an IP address; if that doesn’t work, we’ll just assume it’s not on our home network, in which case it’s a DNS server’s job to turn it into an IP address later on. We only have to do this work once.
ESP8266WebServer
Hey, your ESP8266 can serve up pages over HTTP! And the API is even pleasant to use; if you’ve ever used Sinatra or Flask, you’ll feel at home.
#include <ESP8266WebServer.h>

ESP8266WebServer server(80);

static const char HELLO_WORLD[] PROGMEM = {
  "<!DOCTYPE html>"
  "<html><head>"
  "<title>Hello world!</title>"
  "</head><body>"
  "Hello world!"
  "</body></html>"
};

char tempJsonString[101];

void setup() {
  server.on("/", HTTP_GET, []() {
    // Send a string from PROGMEM.
    server.sendContent_P(HELLO_WORLD);
  });

  server.on("/settings/get", []() {
    int someValue = getSomeValue(); // [pretend this is real]
    sprintf(tempJsonString, "{ \"foo\": %d }", someValue);
    server.send(200, "application/json", tempJsonString);
  });

  server.begin();
}

void loop() {
  server.handleClient();
}
But! Don’t go overboard here.
- Running a server with a single endpoint that shows diagnostic data for debugging purposes: fine idea.
- Running a server with a few regular‐sized pages of HTML and JavaScript: mediocre idea, but it has its place. Read the documentation, store those big strings in PROGMEM, and use CDN‐hosted JavaScript libraries if you can.
- Running a complex web app with a robust HTTP API that, like, consumes JSON post data and emits, I don’t know, XML or something ridiculous: good god, friend. You know this hardware costs $4, right?
Serving HTTP is glorified string‐building, and that’s not what embedded devices excel at. If you want to put a fancy interface on your data, consider writing a web app that lives on your IoT server and communicates with your device via MQTT or something. Remember that your device can subscribe to MQTT as well as publish to it — some ESP8266 tools use this method to expose an API for changing device state and/or settings.
I don’t want to overstate it — your ESP8266 can serve up even complex responses as long as you’re smart about how you build your strings. Like if you know your response will never be larger than X characters, you can allocate the space for that string once and then reuse it every time.
If you want your device to be able to parse and generate arbitrary JSON, and I haven’t talked you out of it, then take a look at the ArduinoJSON library, and strongly consider buying the exhaustive guide as a way of supporting its author. It’s really quite nice to work with.
What’s next?
Go wash your clothes.
Yes. And after that?
Well, I’ll probably take a break before I start another series like this, but maybe next time I’ll talk more about what I’ve been doing with Node‐RED. I’ve found that it excels at turning one sort of interface into another: making MQTT data available via web sockets, wrapping an HTTP API around a proprietary smart switch, and so on.
Maybe I’ll even write the whole thing ahead of time so I can tell you at the beginning how much reading I’m making you do.
Comments
What a great series!
I’ve done a bunch of iot projects with the wemos D1 mini (also an esp8266 based board), and I liked seeing your take on the tools.
This was fun to read, and very informative!
Have you looked at the wifimanager library for the arduino/esp core? It does a really nice job of trying to connect to previously known networks and then falling back to an access point with a captive portal for configuration if autoconnect fails. It’s not really relevant for your project per sé, but it has the added benefit of not having to hardcode credentials for when you publish/share code.
Looking forward to reading more of your stuff in the future!
Mark, thanks for the kind words.
I have used WifiManager before. I like that I don’t have to hardcode credentials, but I don’t like that its default behavior means that a device will end up in AP mode indefinitely if my WiFi drops out for whatever reason. A couple months back I was going through some mesh networking growing pains, and every time I lost WiFi I’d have to go around the house and power-cycle my ESPs so they’d connect again.
I’m sure there’s a way to tell it to try reconnecting to the original network every so often, so I might revisit it in the future.
Aha — in fact, there is a setConfigPortalTimeout method. I’m pretty sure that’s how I solved that particular problem on my temperature monitors, now that I think about it.
WifiManager was handy for my temperature monitors because I was flashing multiple devices with the same firmware; I set it up with a custom config parameter so I could give each of them its hostname via the config portal instead of hard-coding it in the sketch.
I’ve built this whole unit and everything appears to be working ok, expect it doesn’t seem like its setting the initial state correctly. All the values I am getting are like 1.10 1.09, etc. on both units. I used the code directly from your github, and reviewed it but I can’t seem to find the issue. thoughts?
Ben, I got similar feedback in the comments of this Gist and I don’t have a quick fix for it. I have encountered the problem you describe, but not consistently — a reset typically results in an initial reading closer to 0. Perhaps try rotating the sensors so that a different axis is receiving the pull of gravity and see if that changes the readings you get.
If I revisit this project, I’ll probably tweak the code so that it’s more tolerant of oddball readings like that. As long as the force reading fluctuates when the machine vibrates, the initial reading doesn’t have to be near zero; precision, not accuracy, is all we need.
Andrew,
It looks like the problem is the initial read is happening before the LIS3DH are fully started up. Adding a delay to line 210, just before you set the initial value fixed the issue. Feel free to add to your Gist.