I try to write tutorials with an audience in mind, but often the audience I’m picturing is “people like me” — people who know a bit about code and are slowly becoming demystified about electronics. A beginner’s tutorial would highlight a less ambitious project, and an expert’s tutorial would merely cover the bullet points of which hardware I used and the general strategy I took in my code. I’m trying my best to walk the tightrope between those extremes! But that’s how a two‐part series turns into a four‐part series. Apologies.
In Part 1, we built the hardware for our laundry spy, combining two cheap accelerometers with a cheap ESP8266 module to make something capable of sensing vibration and communicating over WiFi.
In Part 2, we set up a home automation server with Node‐RED that’s capable of receiving messages over MQTT and pushing notifications to our phone via Pushover.
Today, in Part 3, we’ll bridge the gap: it’s time to write the firmware for the hardware we made in Part 1. It’ll turn the raw acceleration data into determinations about when our machines are running and report its findings over MQTT to our home automation server.
If you’ve never worked with an Arduino or similar microcontroller before, I strongly suggest that you start with a simpler project to get your feet wet. Blinking an LED might not be exciting, but at least it’s not baptism by fire.
The setup
Thanks to the work of some really smart people over the last couple of years, the same toolchain that’s used to program Arduinos can be used to program an ESP8266. In fact, most libraries written for Arduino hardware can work on ESP8266 with little or no modification.
If you are comfortable with the Arduino IDE, your best bet is to follow this SparkFun guide for installing the ESP8266 addon. This will allow you to treat a plugged‐in ESP8266 board (like the NodeMCU we’re using) just like an Arduino, with all the features you’re used to: one‐click uploading, builtin serial monitor, and the like. (If you have no experience with Arduino or ESP8266, this is still probably the best option.)
If you prefer to use your own IDE, you’ll likely be much happier using PlatformIO. The website emphasizes the integrations with Atom and VSCode, but in my mind its real upside is the IDE‐agnostic command‐line tooling so that you can upload and debug from the terminal regardless of your editor. I installed it via pip…
sudo pip install platformio…but there are other installation methods, including Homebrew and an ordinary installer script.
Firmware
Wow, that was tedious! No wonder I put off this writeup until Part 3.
But back to the actual software we’re trying to write. Where do we even start with this? What should we think about before we decide how to architect this code?
- We’ve got two accelerometers — one attached to the washer and one attached to the dryer — and we need them to operate independently of one another. That means each should know which sensor it needs to talk to, and should be able to keep track of its force data and state independent of the other machine.
- Despite this separation, we can write the code pretty abstractly, and each machine can operate off of the same logic. If a machine starts vibrating and doesn’t stop for a while, we’ll decide it’s running a cycle. Then, if it stops vibrating for a while, we’ll conclude that the cycle is over. This approach will work for both the washer and the dryer. The main difference is that one of them might vibrate more than the other during a cycle, so we should be able to “tune” them independently of one another.
- They also shouldn’t get in each others’ way; if the washer is idle but the dryer is running, the washer’s sensor should be tuned well enough not to give us a false positive.
- Remember: the server is the one in charge of sending out the phone notification when a cycle is done. When we decide a cycle has started or finished, we can publish a message on an MQTT topic. The only external responsibility that the laundry spy has is to “think out loud” so that our IoT server can act on that information.
How do we quantify vibration?
The sensor we’re using features three‐axis detection. I don’t want three values; I want one value that quantifies how much the machine is vibrating.
Hypothetically, let’s hook an accelerometer up to a microcontroller and then place it so it’s resting flat on a table. If we were to ask it for its acceleration values, it would tell us something like
X: 0.0
Y: 0.0
Z: 1.0
because the Z‐axis is receiving all of gravity’s pull. (The unit here is gs, where 1g = the amount of acceleration imposed by gravity on Earth at sea level).
If we were to flip the sensor up on its side and stand it perfectly straight somehow, then we’d get something like
X: 0.0
Y: 1.0
Z: 0.0
because a different axis is now feeling the pull of gravity. You get the idea.
This is useful for stuff like orientation detection, of course, but I don’t need orientation detection. I don’t actually care about gravity at all. I just care about the acceleration imposed by the washing machine, and how much it changes over time. But how can I remove gravity from the math without mandating that the sensor be oriented a certain way?
Let’s try this: I’ll take an initial force reading on each axis for each machine. We’ll treat that as the baseline against which all other force readings will be compared. Then, when I want an update, I’ll take the current acceleration value on each axis and calculate how much it varies from our initial reading for that axis. It’ll look something like this:
float initialX;
float initialY;
float initialZ;

void setup () {
  initialX = accel.getX();
  initialY = accel.getY();
  initialZ = accel.getZ();
}

void loop () {
  // (`fabs` gives the absolute value of a float)
  float deltaX = fabs(accel.getX() - initialX);
  float deltaY = fabs(accel.getY() - initialY);
  float deltaZ = fabs(accel.getZ() - initialZ);

  // Distill the deltas down into one value representing
  // net vibration.
  float force = deltaX + deltaY + deltaZ;

  // ...
}
Now we’ve got a way to turn the three‐dimensional data from the accelerometer into a simple vibration score. At any point, we can retrieve the score as a way of asking, “how much is my washer or dryer vibrating right now?” If the answer is “a little,” we’ll get back a small number like 0.03, and if it’s “quite a lot indeed,” maybe we’ll get something like 0.5. Without trying it, I don’t know how much the value we get during vibration will vary from the nearly‐zero value we get when the appliance is idle, but I’m not expecting big acceleration changes from a machine that needs two people to lift.
How do we decide when the appliance is on?
Now, a single force reading by itself won’t tell us much. One force spike could be triggered by, say, running down the hall, or briefly standing on the machine while fishing a lightbulb out of the cabinet above. (Don’t do this.)
But the vibration of a washer or dryer is caused by steady and consistent oscillation. If I measure acceleration several times a second, the scores I get back will probably be all over the place — because each time I ask I’m catching the machine at a different point in the oscillation.

Suppose this is a graph of vibration scores over time. The red line is how I imagine the vibration score of an idle washing machine: nearly zero, with occasional spikes that are caused by red herrings. The blue line is how I imagine the vibration score of a washing machine in a cycle: oscillating, with consistent and predictable spikes.
The orange line is a hypothetical score threshold that lets us distinguish these two scenarios. To detect an active machine, we don’t just want a vibration score that exceeds the threshold once; we want one that exceeds that threshold regularly over some window of time.
Visualizing the problem
I like state machines for a few reasons:
- They give me a sort of scaffolding for a problem I haven’t quite figured out yet. In this case, I can think about the states I need for each appliance and, through trial and error, develop a mental model of how to transition between those states.
- They simplify my code by allowing me to consider states in isolation from one another. If there’s no plausible way for State A to lead directly to State B, it’s easier to put up the guard rails in my state machine and prohibit that transition explicitly than it is to hope that my modeling of the problem is elegant enough to rule it out implicitly.
- They reveal in pretty short order whether they’re the right tool for the job. If I think “hm, a state machine might be the answer here,” and after 20 minutes I’m still stuck on what my states should be, or I have to put in a bunch of special cases where any state can transition to any other state, then I should go back to the drawing board and choose a different strategy. “Time to initial regret” is an undervalued metric.
- They can be visualized.

So we’ve got three definitive states — Idle, On, and Done. We’ve also decided that we can’t go from Idle straight to On based on a single reading — and that’s also true for transitioning from On to Done — so we’ve also got two in‐between states we use when we think the state has changed but we’re not yet sure.
The visualization helps us realize that a state machine is a good approach. We know which states to draw arrows between, and we have a good idea of how each state transition will get triggered. We can also see that this is naturally a “modal” situation; our “what do I do next?” logic is almost entirely dependent on what state we’re currently in.
- When we’re Idle, all we care about is whether the most recent force reading exceeds our threshold. If so, we transition to Maybe On.
- When we’re Maybe On, we meditate until we have enough evidence to go backward (Idle) or forward (On). Consistency is what separates false positives from the real thing, so we want to go forward if the threshold is exceeded on a consistent basis for, say, 30 seconds. Which means that we want to go backward if the opposite happens — if we go a few seconds without a spike.
- Once we’re On, we can’t go backward, so all we care about is whether the machine has stopped yet. The script flips; steady vibration is now the status quo. If we go a few seconds without a vibration spike, then we transition to Maybe Done.
- When we’re Maybe Done, we meditate until we have enough evidence to go backward (On) or forward (Done). This is nearly a mirror image of the Maybe On state. If the vibration score spikes while we’re in this state, we’ll move back to On and call it a false alarm. But the longer we go without a spike, the more confident we should be in our prediction. After, say, a couple minutes, we have enough evidence to transition to Done.
- The Done state doesn’t last long; it exists so that we can put a value into the MQTT topic that means “the cycle just finished.” After we publish, we can transition back to Idle automatically.
Here’s how I’d translate the above brain dump into code:
// How long (in milliseconds) do we have to be MAYBE_ON before we decide we’re
// actually ON?
#define TIME_UNTIL_ON 30000
// How long (in milliseconds) do we have to be MAYBE_DONE before we decide
// we’re actually DONE?
#define TIME_UNTIL_DONE 90000
// How long (in milliseconds) of a vibration lull would convince us that the
// machine isn’t really ON and we should return to IDLE?
#define TIME_WINDOW 3000

enum ApplianceState {
  IDLE,         // Nothing is happening.
  MAYBE_ON,     // Recent vibration, but we're not sure yet if it means anything.
  ON,           // Consistent vibration for a while; we're on.
  MAYBE_DONE,   // Vibration stopped very recently. Are we done?
  DONE          // Vibration stopped a while ago. We're definitely done.
};

class Appliance {
  private:
    LIS3DH accel;
    // When were we last in the idle state?
    long lastIdleTime = 0;
    // When did the vibration score exceed our threshold, regardless of state?
    long lastActiveTime;
    // The last vibration score.
    float force = 0.0;
    // The threshold for this machine.
    float threshold;

    // The original acceleration readings for each axis.
    float initialX;
    float initialY;
    float initialZ;

    void readAccelerometer() {
      float total = 0;

      lastX = accel.readFloatAccelX();
      lastY = accel.readFloatAccelY();
      lastZ = accel.readFloatAccelZ();

      total += fabs(lastX - initialX);
      total += fabs(lastY - initialY);
      total += fabs(lastZ - initialZ);

      force = total;
    }

  public:
    // The name of the appliance ("Washer" or "Dryer").
    String name;
    ApplianceState state;

    void setup () {
      // NOT PICTURED: Accelerometer setup.

      // Take our initial force readings.
      initialX = accel.readFloatAccelX();
      initialY = accel.readFloatAccelY();
      initialZ = accel.readFloatAccelZ();
    }

    void setState (ApplianceState s) {
      state = s;
      // NOT PICTURED: Publishing the state via MQTT when it changes.
    }

    void update () {
      readAccelerometer();
      long now = millis();

      if (force > threshold) {
        lastActiveTime = now;
      }

      // Did we exceed our threshold at any time in the last three seconds?
      bool wasRecentlyActive = (now - lastActiveTime) > TIME_WINDOW;

      switch (state) {
        case IDLE:
          if (wasRecentlyActive) {
            setState(MAYBE_ON);
          } else {
            lastIdleTime = now;
          }
          break;
        case MAYBE_ON:
          if (wasRecentlyActive) {
            // How long have we been in this state?
            if (now > (lastIdleTime + TIME_UNTIL_ON)) {
              // For a while now! We must be in a cycle!
              setState(ON);
            } else {
              // Wait and see.
            }
          } else {
            // No vibration in the last three seconds. False alarm!
            setState(IDLE);
          }
          break;
        case ON:
          if (wasRecentlyActive) {
            // This matches our expectation, so we must be in the right state.
          } else {
            // We stopped vibrating. We might be off.
            setState(MAYBE_DONE);
          }
          break;
        case MAYBE_DONE:
          if (wasRecentlyActive) {
            // We thought we were done, but we’re vibrating again. False alarm!
            setState(ON);
          } else if (now > (lastActiveTime + TIME_UNTIL_DONE)) {
            // We’ve been in this state for a while now. We must be done with a cycle.
            setState(DONE);
          }
          break;
        case DONE:
          // Nothing to do except reset now.
          setState(IDLE);
          break;
      }
    }
}
This isn’t the whole sketch, or even the whole Appliance class; it’s just the parts having to do with state logic. But hopefully it’s enough to paint a picture. The washer and the dryer share most of their code through being instances of an Appliance class. We’ll use instance members for the things that will vary between the two machines, like so:
// We've got two sensors at two different I2C addresses.
LIS3DH accelWasher(I2C_MODE, 0x19);
LIS3DH accelDryer(I2C_MODE, 0x18);

// We can pass each sensor instance into an `Appliance` constructor along with
// the appliance name, the MQTT topics we want it to use, and a vibration
// threshold.
Appliance washer("Washer", "/laundry/washer/state", "/laundry/washer/force", accelWasher, 0.12);
Appliance dryer("Dryer", "/laundry/dryer/state", "/laundry/dryer/force", accelDryer, 0.08);
By convention, Arduinos run a setup function when your sketch starts running, then a loop function over and over indefinitely. Here, we can instantiate the two Appliances globally, do any setup work in the setup function, then update each one in the loop function:
void setup () {
  washer.setup();
  dryer.setup();
}

void update () {
  washer.update();
  dryer.update();
}
The whole sketch
Here’s the whole sketch as a gist. Look it over and fill in your own values in the “config” section: host name for the spy, IP address of your MQTT server, and so on.
Pick whatever values you want for WASHER_THRESHOLD and DRYER_THRESHOLD, or just keep them as they are for now. In the next installment you’ll be monitoring the force data reported by your own laundry spy in order to figure out good thresholds for your specific machines.
The libraries
We’re relying on libraries to do a lot of the work here. Some of them are built into the Arduino/ESP8266 toolkit and some of them require their own installation. Here are the ones you’ll need to install:
- PubSubClient is the library that publishes messages over MQTT. Available in the Arduino IDE’s Library Manager or via
platformio lib install PubSubClient. - The SparkFun LIS3DH library complements the two LIS3DH sensors we got. Search for “LIS3DH” in the Library Manager or run
platformio lib install "Sparkfun LIS3DH Breakout". - SimpleTimer is my preferred library for scheduling tasks to run in the future — either once or at a regular interval. For some reason, you can’t install it from the Library Manager, so visit this page and follow the instructions under the “Installation” heading. Or, if you’re using PlatformIO, run
platformio lib install SimpleTimer.
Every other library we use in this sketch comes built‐in with the ESP8266/Arduino integration.
The moment of truth
Click on that ✔ button in the Arduino IDE’s toolbar (or run platformio run from your project root if you’re on PlatformIO). After a long meditation, it’ll decide whether your project compiles. If it doesn’t, then I’ve done poorly in this tutorial and missed a necessary step, or else you’ve made major changes to the sketch and introduced errors.
Hook up your hardware to your computer via the USB micro port on the side. Once plugged in, it ought to show up in the Arduino IDE under Tools → Ports. The CP2104 chipset will have a name containing SLAB_USBtoUART, whereas a CH340G chipset will have a name containg wchusbserial. (PlatformIO users don’t have to choose a port unless they’ve got more than one serial device hooked up at once; it’ll figure out which one is correct.)
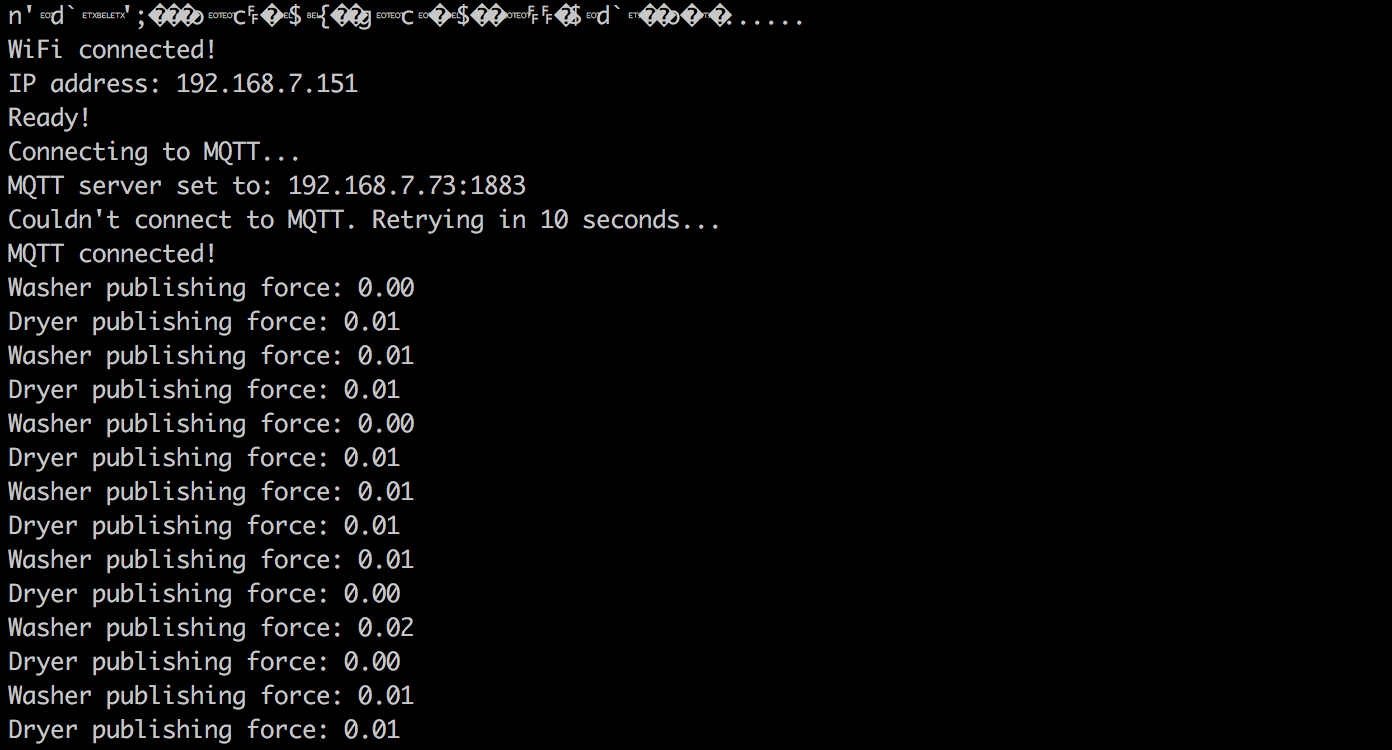
Now upload the sketch with the → button in the Arduino IDE, or by running platformio run -t upload. Twiddle your thumbs for a minute as the upload proceeds. When it’s done, go to Tools → Serial Monitor (PlatformIO: platformio device monitor) to view the serial output. Verify that the sketch is connecting to your WiFi network and finding your MQTT server, and that it can read from the two accelerometers and turn that data into appliance states.
Take a break
If all of this is working so far, then all we’ve got left is to tune your washer and dryer to figure out good force threshold values, and then iron out the inevitable complications. Part 3 is long enough already, so let’s save it for the big finale.
Next time we’ll be analyzing the vibration data your washer and dryer report so that you can tune your spy for accuracy. Once everything is working properly, we’ll also look at some other things you can throw into this sketch to make your life easier.